

Mini PC Setup Guide: First Boot to Windows 11 Updates
Setting up a Mini PC is straightforward once you answer one question first: did you buy a configured system or a barebone unit? A configured Mini PC normally arrives with memory, storage and an operating system when those items are listed in the order. A barebone option may arrive without RAM, an SSD or Windows, so it cannot follow the same first-boot path.
That distinction matters on the GMKtec EU store. For example, the current NucBox K8 Plus and NucBox M3 Pro pages distinguish a barebone option from configured choices. Always use your exact product page and order confirmation rather than assuming every model includes the same parts.
1. Confirm what is included before switching on
Read the configuration line on your order confirmation and compare it with the product specification. Use this simple branch:
| Your configuration | What to do next |
|---|---|
| RAM, SSD and Windows are listed | Leave the chassis closed and continue to the connection and first-boot steps. |
| Barebone, no RAM, no SSD or no OS is listed | Install compatible memory and storage, then prepare a licensed operating system before normal use. |
| The order description is unclear | Stop and confirm the exact configuration before buying parts or opening the chassis. |
The existing GMKtec Mini PC Guide explains why memory generation, maximum capacity, storage format and physical size must match the exact model. A DDR4 module is not interchangeable with DDR5, and an M.2 slot description should be checked for its supported length and interface before you order an SSD.
2. Gather the right setup kit
For either path, have these items ready:
- the power adaptor supplied with the Mini PC;
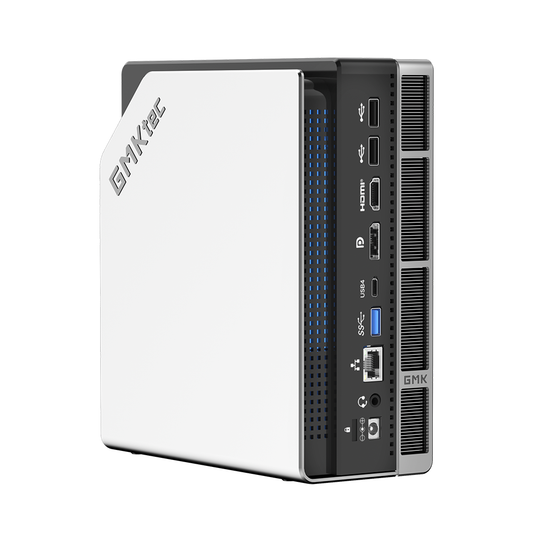
- a monitor and a cable that match one of the model's verified display outputs;
- a wired keyboard and mouse for the simplest first boot;
- an Ethernet cable if available, which is useful if Wi-Fi drivers are not ready yet;
- the exact model name and its product or support page;
- a second computer and a blank USB drive of at least 8 GB if you need to install Windows 11.
For a barebone build, add only the RAM and SSD types confirmed for that model. Do not select parts from the processor name alone: two Mini PCs using related processors can still have different memory, storage and chassis requirements.
3. Barebone path: install memory and storage first
Chassis access, slot locations, screws, heat spreaders and cable routing vary, so a universal screw-by-screw method would be unsafe. Use the manual for the exact model and follow this high-level sequence:
- Disconnect power and every peripheral. Work on a dry, stable, non-carpeted surface and discharge static before touching components.
- Open the chassis only as described in the exact manual. Keep screws and thermal pads in their original positions.
- Install the supported memory and SSD without forcing a connector. If a module does not align easily, stop and recheck its type and orientation.
- Confirm that clips, screws and any supplied heat spreader are secure, then close the chassis before connecting power.
Use the official GMKtec Download Center to look for the exact model's manual and downloads. If the model, component specification or opening procedure remains unclear, use the GMKtec EU contact page before proceeding.

4. Barebone path: create official Windows 11 media
A barebone option labelled without an operating system should not be assumed to include a Windows licence. Check the product description and arrange a valid digital licence or product key for the edition you intend to install.
- On another trusted Windows computer, open Microsoft's official Windows 11 download page.
- Use the Media Creation Tool to prepare a blank USB drive. Microsoft's installation-media instructions specify at least 8 GB and warn that the drive's existing contents will be deleted.
- Before installation, compare the hardware with the Windows 11 system requirements. These include a 64 GB or larger storage device, UEFI Secure Boot capability and TPM 2.0.
- Connect the installer, display, keyboard and mouse to the assembled Mini PC. Use the exact model's manual for its boot-menu method; do not copy a BIOS key or firmware setting from another model.
- Select the Windows edition that matches your licence. If an SSD contains files from an earlier computer, stop and back it up before changing or deleting any partition.
Do not use unofficial Windows images, activation scripts or drivers from file-sharing sites. They add avoidable security and licensing risk at the point when the computer is least protected.
5. Configured path: connect for the first boot
If your order includes RAM, storage and Windows, you can begin here:
- Place the Mini PC on a firm surface with its ventilation openings unobstructed.
- Connect one monitor directly to a verified display output. Start with a simple direct cable rather than a dock or adaptor where possible.
- Connect the wired keyboard, mouse and optional Ethernet cable.
- Connect the supplied power adaptor last, then switch on the Mini PC.
- Complete the Windows region, keyboard, network, privacy and account screens. Allow the computer to finish each stage rather than forcing a shutdown.
A configured system should normally enter Windows setup. A barebone system with a blank SSD should enter its boot process or the installation media instead. If the result does not match your configuration, recheck the order description before changing firmware settings.

6. Update Windows and drivers in a controlled order
Once the Windows desktop is available, update the software before installing a large collection of apps:
- Open Settings > Windows Update and choose Check for updates. Install the available updates and restart when requested. Repeat until a further check offers no required update. Microsoft's Windows Update guide documents the current path.
- Check Settings > Windows Update > Advanced options > Optional updates for relevant driver updates. Microsoft explains that Windows Update supplies recommended drivers and that the hardware maker's site is the fallback when a required driver is missing.
- If Wi-Fi, Ethernet, audio, Bluetooth, graphics or another device is still missing, return to the GMKtec Download Center and select the exact model and Windows version. Do not install a similarly named model's package.
- Open Settings > System > Activation and confirm the status. Microsoft's Windows activation guide explains digital licences, product keys and edition matching.
Treat BIOS updates differently from routine Windows and driver updates. Apply one only when GMKtec publishes it for the exact model and the instructions address your situation. The model-specific EVO-X1 PRO startup-freeze article is a good example of why firmware guidance should remain tied to a named device and issue.
7. Test the essentials before moving your files
A short functional check is easier to diagnose than a problem discovered after many accessories and apps have been added. Test one area at a time:
- Display: confirm a stable picture at the monitor's intended resolution, then test any additional display separately.
- Network: verify Ethernet and Wi-Fi independently if you plan to use both.
- Audio: test the intended speakers, headphones or display audio.
- USB and Bluetooth: connect one known-good device at a time.
- Storage and memory: confirm that Windows detects every installed drive and memory module, then compare the reported capacity with the order configuration and product documentation.
- Restart and sleep: complete at least one normal restart and wake cycle.
If something fails, remove docks, hubs and optional peripherals, return to one display and a wired keyboard, then repeat the relevant test. This isolates the Mini PC from the cable, adaptor or accessory before you change drivers or firmware.
8. Set up recovery before daily use
After activation, updates and hardware checks pass, create a recovery habit before moving important work. Windows Backup is one available option for files, settings and selected account data; Microsoft documents how to configure Windows Backup. You can also use another tested backup method that fits your storage and privacy requirements.
Keep the order confirmation, exact model name, Windows licence details and any encryption recovery key somewhere separate from the Mini PC. A backup is only useful when you can restore it, so test access to one non-critical file before relying on the process.
Quick Mini PC setup checklist
- Confirm configured versus barebone.
- Verify exact-model RAM, SSD and display compatibility.
- Use the supplied power adaptor.
- Use official Microsoft Windows media and a valid licence when required.
- Run Windows Update, then check optional and model-specific drivers.
- Confirm Windows activation.
- Test display, network, audio, USB, Bluetooth, storage, memory, restart and sleep.
- Create and test a backup.
Choose the next step for your setup
If you are still choosing a system, compare the current configurations in the GMKtec EU Mini PC collection and check whether each option includes RAM, storage and Windows. If you already own one and a specification or setup step is unclear, contact GMKtec support with the exact model and order configuration before forcing a component, changing firmware or installing another model's driver.